NCR FAQs
Last updated: September 17, 2026
A few advanced configurations are involved when configuring your NCR Aloha menu to work with your new GRUBBRR system. In this article, we’ve compiled a list of some of the most frequently asked questions encountered by GRUBBRR clients during onboarding.
How do I Create a New Menu in the Configurator?
GRUBBRR pulls a menu created in the NCR Menu Configurator for display on our kiosks. If you need to create a new menu in the configurator, you can do so by following the steps outlined below:
From the dashboard, click on Web Menu
Select Menu Management from the dropdown
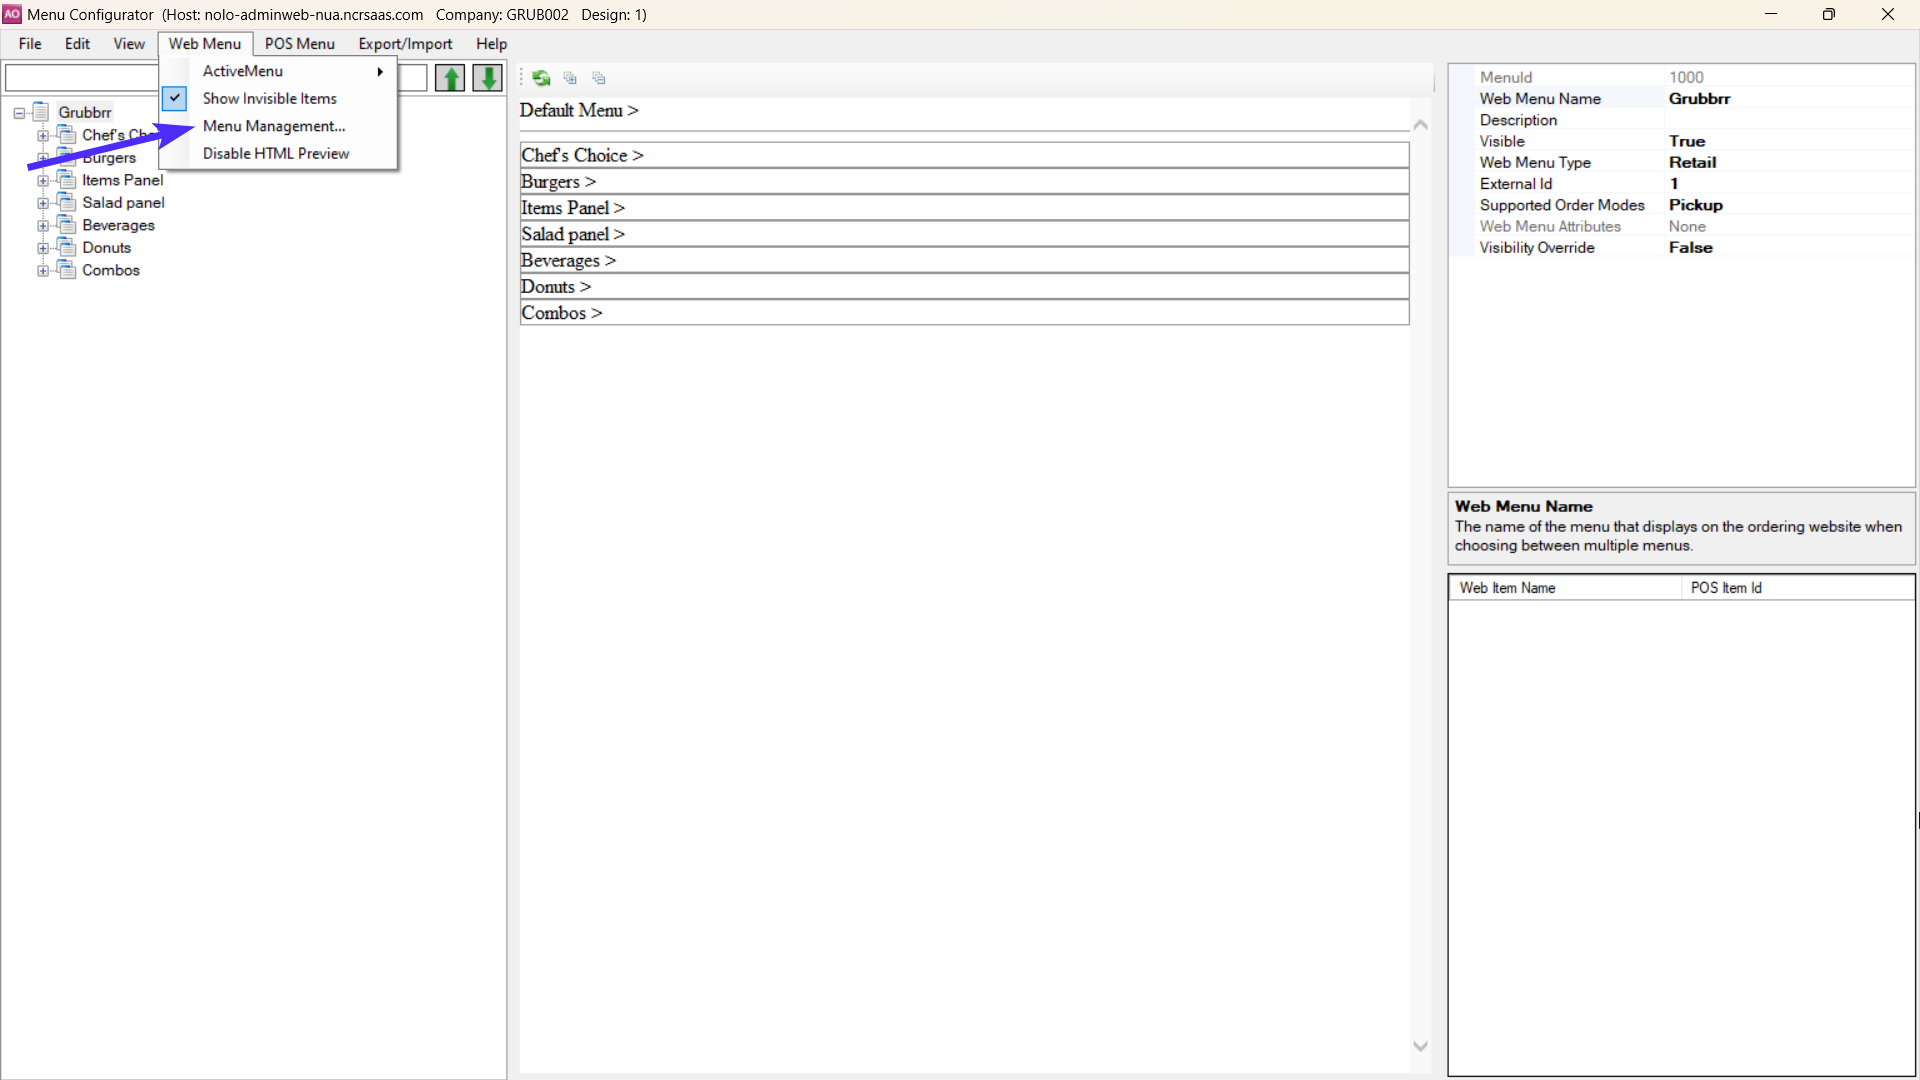
On the Menu Management pop-up, select New Menu
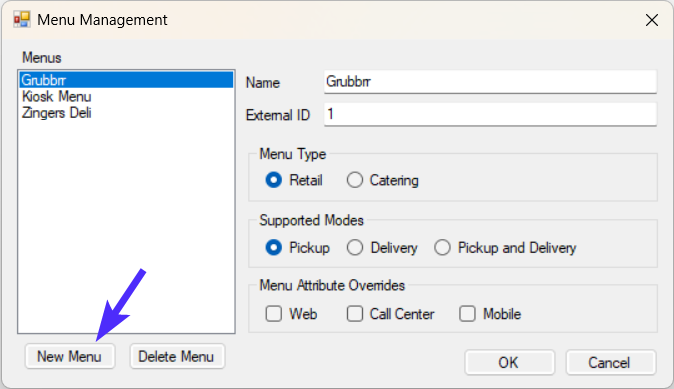
On the New Menu popup window, make the following configurations:
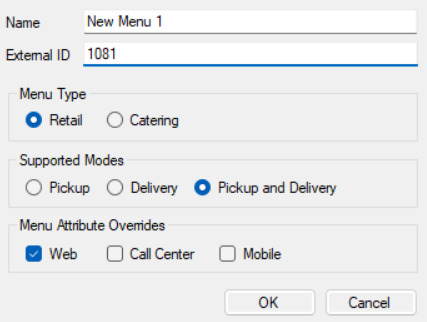
Give your new menu a Name
Assign your menu an External ID (GRUBBRR uses this to connect to your menu)
Selecta Menu Type
Select the Supported Order Modes for your menu
Under Menu Attribute Overrides, select Web
Click OK to finish creating your new menu
Once your menu is created, activate it for editing by clicking Web Menu and selecting it from the Active Menu dropdown.
How do I Add Items to a New Menu in Configurator?
Once you’ve created your menu, you’ll need to update it with new categories and menu items.To configure your new web menu, make sure that it is your active menu in Configurator, and then follow the steps below:
Right-click on the Menu Name
Select Create New Submenu from the dropdown; this will create your first menu category
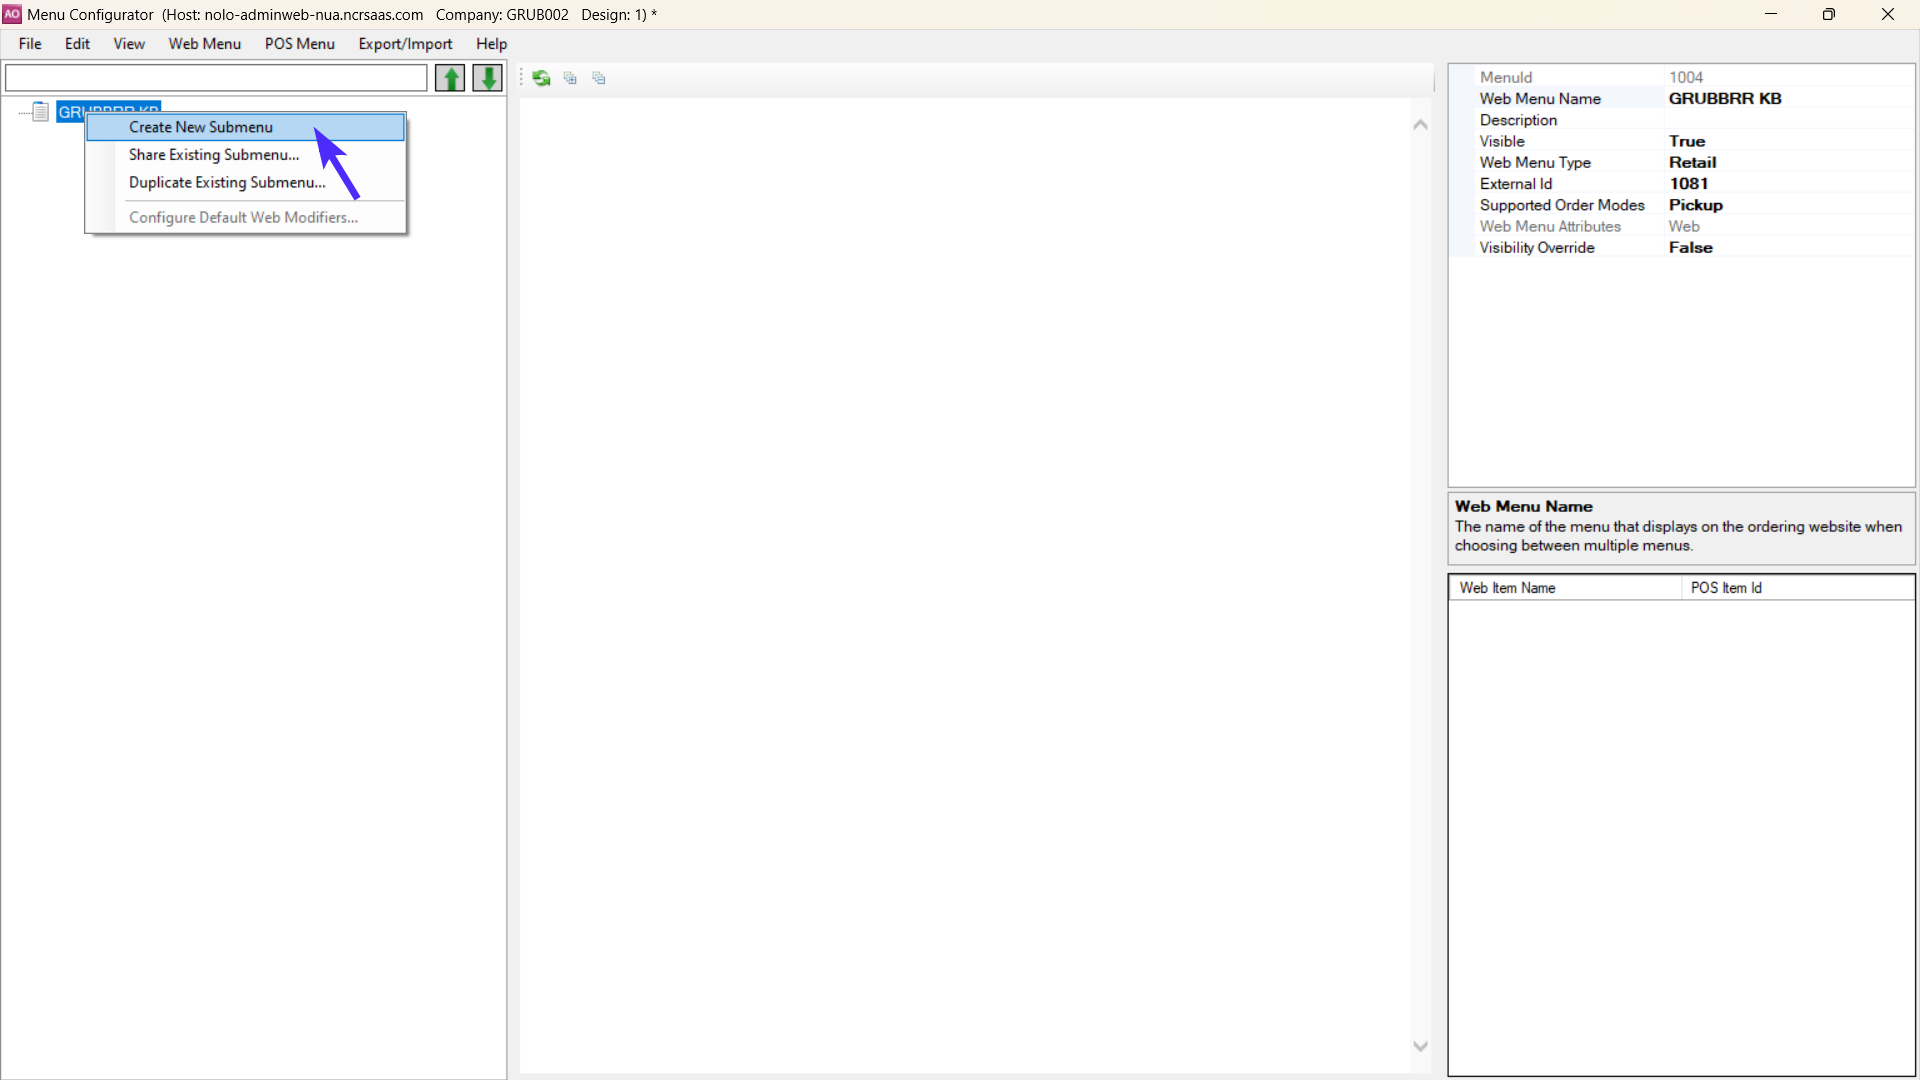
Click the name of the submenu to open the Submenu Details page, then make the following configurations in the window at the right side of the screen:
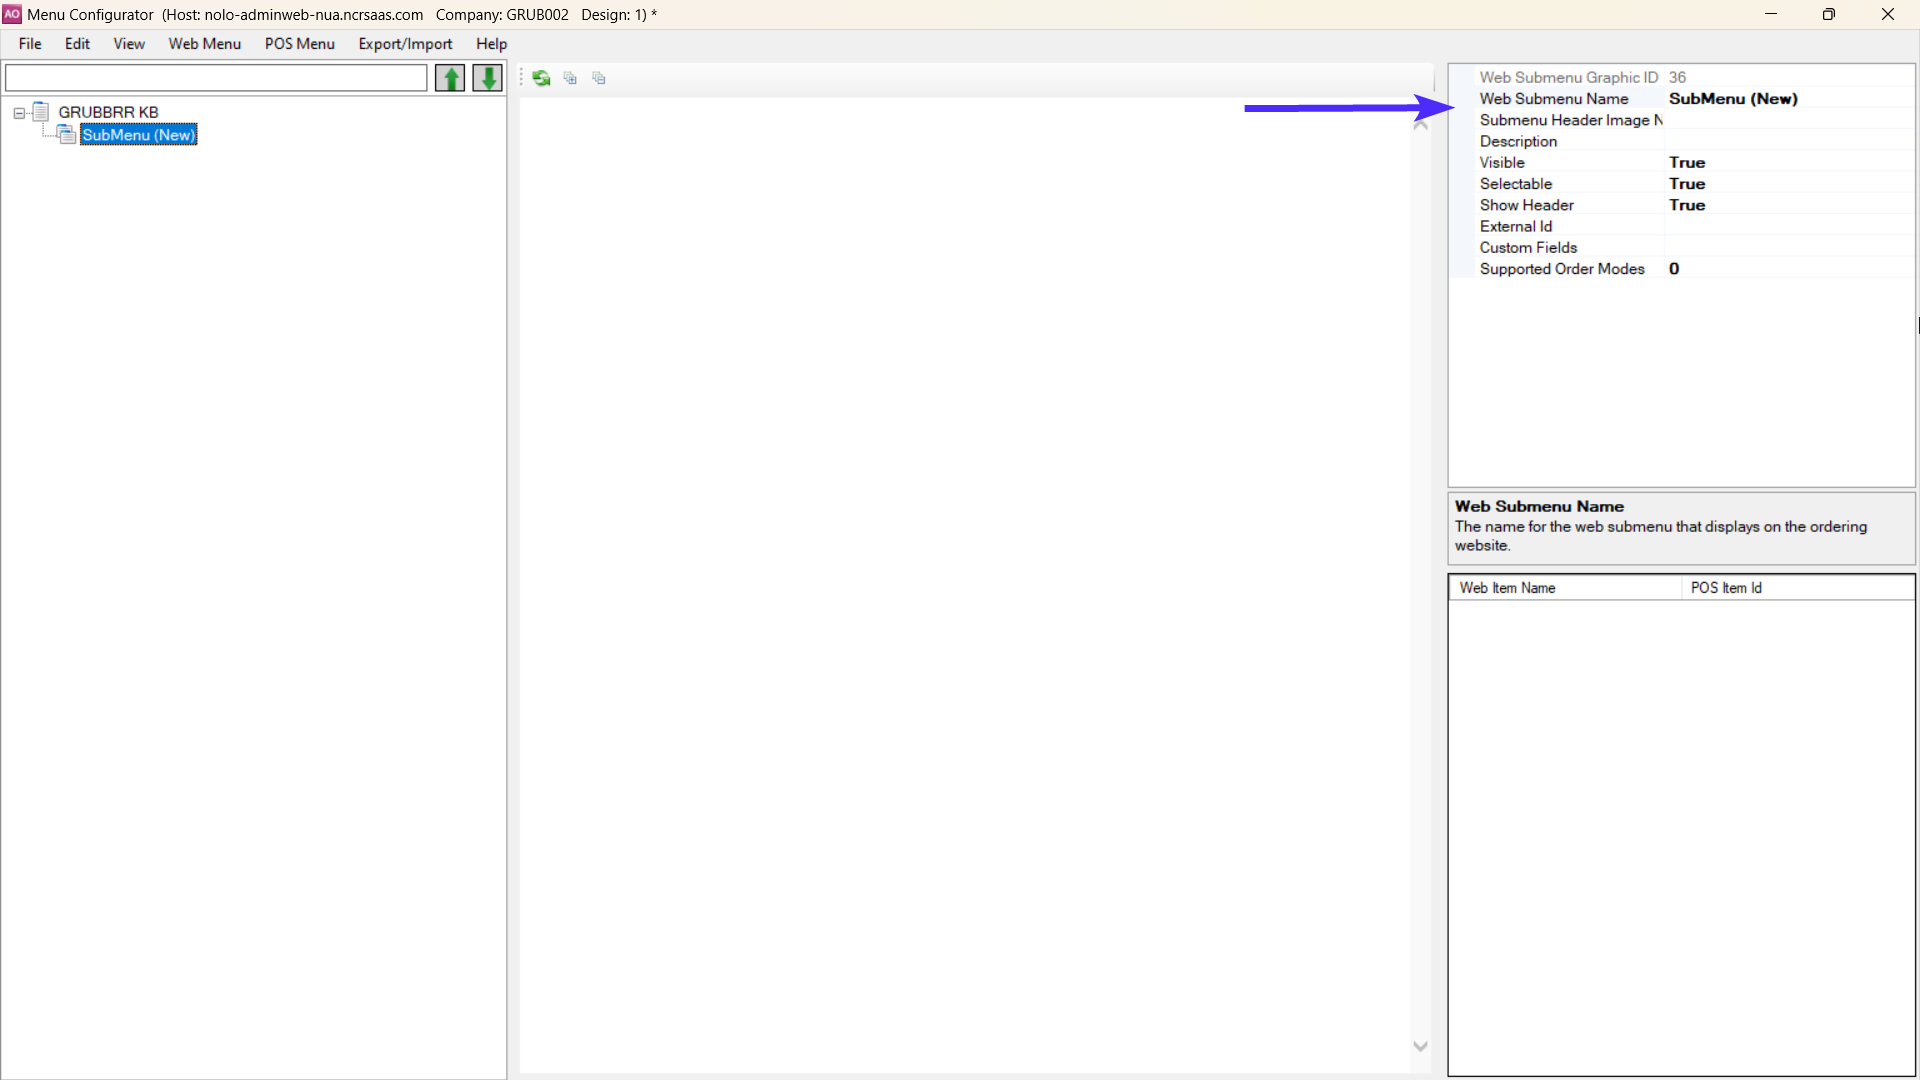
Give your category a Name
Write a brief Description if desired
Make sure that Visible, Selectable, and Show Header are all set to True
Assign the category an External ID
Once the Submenu is created, you can add items by right-clicking on the Submenu name and selecting:
Create New Web Menu Item to add items from your POS to the category
Share Existing Web Menu Items to copy fully configured items from a different Aloha Web Menu if you have one available
How do I configure a New Menu Item?
When “creating” a new menu item, use the Configurator’s built-in Search function to find the item(s) you wish to include in your new Web Menu, and check the box marked Add (this can be done in bulk), then select the option labeled POS under the Build Web Item From heading
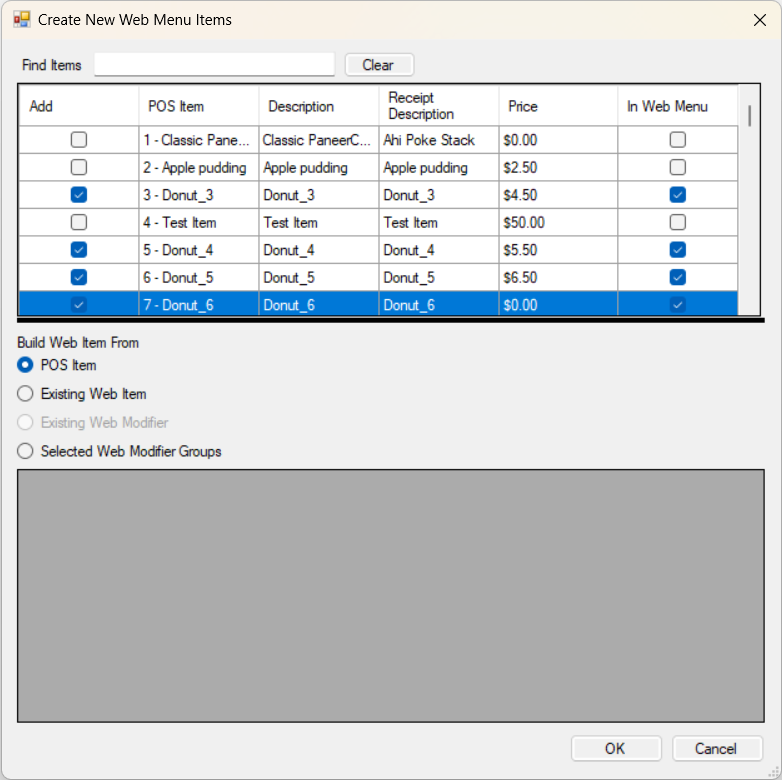
Clicking OK adds the item(s) and any attached modifiers from your POS to your new web menu.
Once you’ve added an item, you can make some overrides to the item in the Configurator by following the steps outlined below:
Click the Item’s Name in the left sidebar to open the Item Detail’s screen; then, in the details window at the right, you have the option to make the following changes:
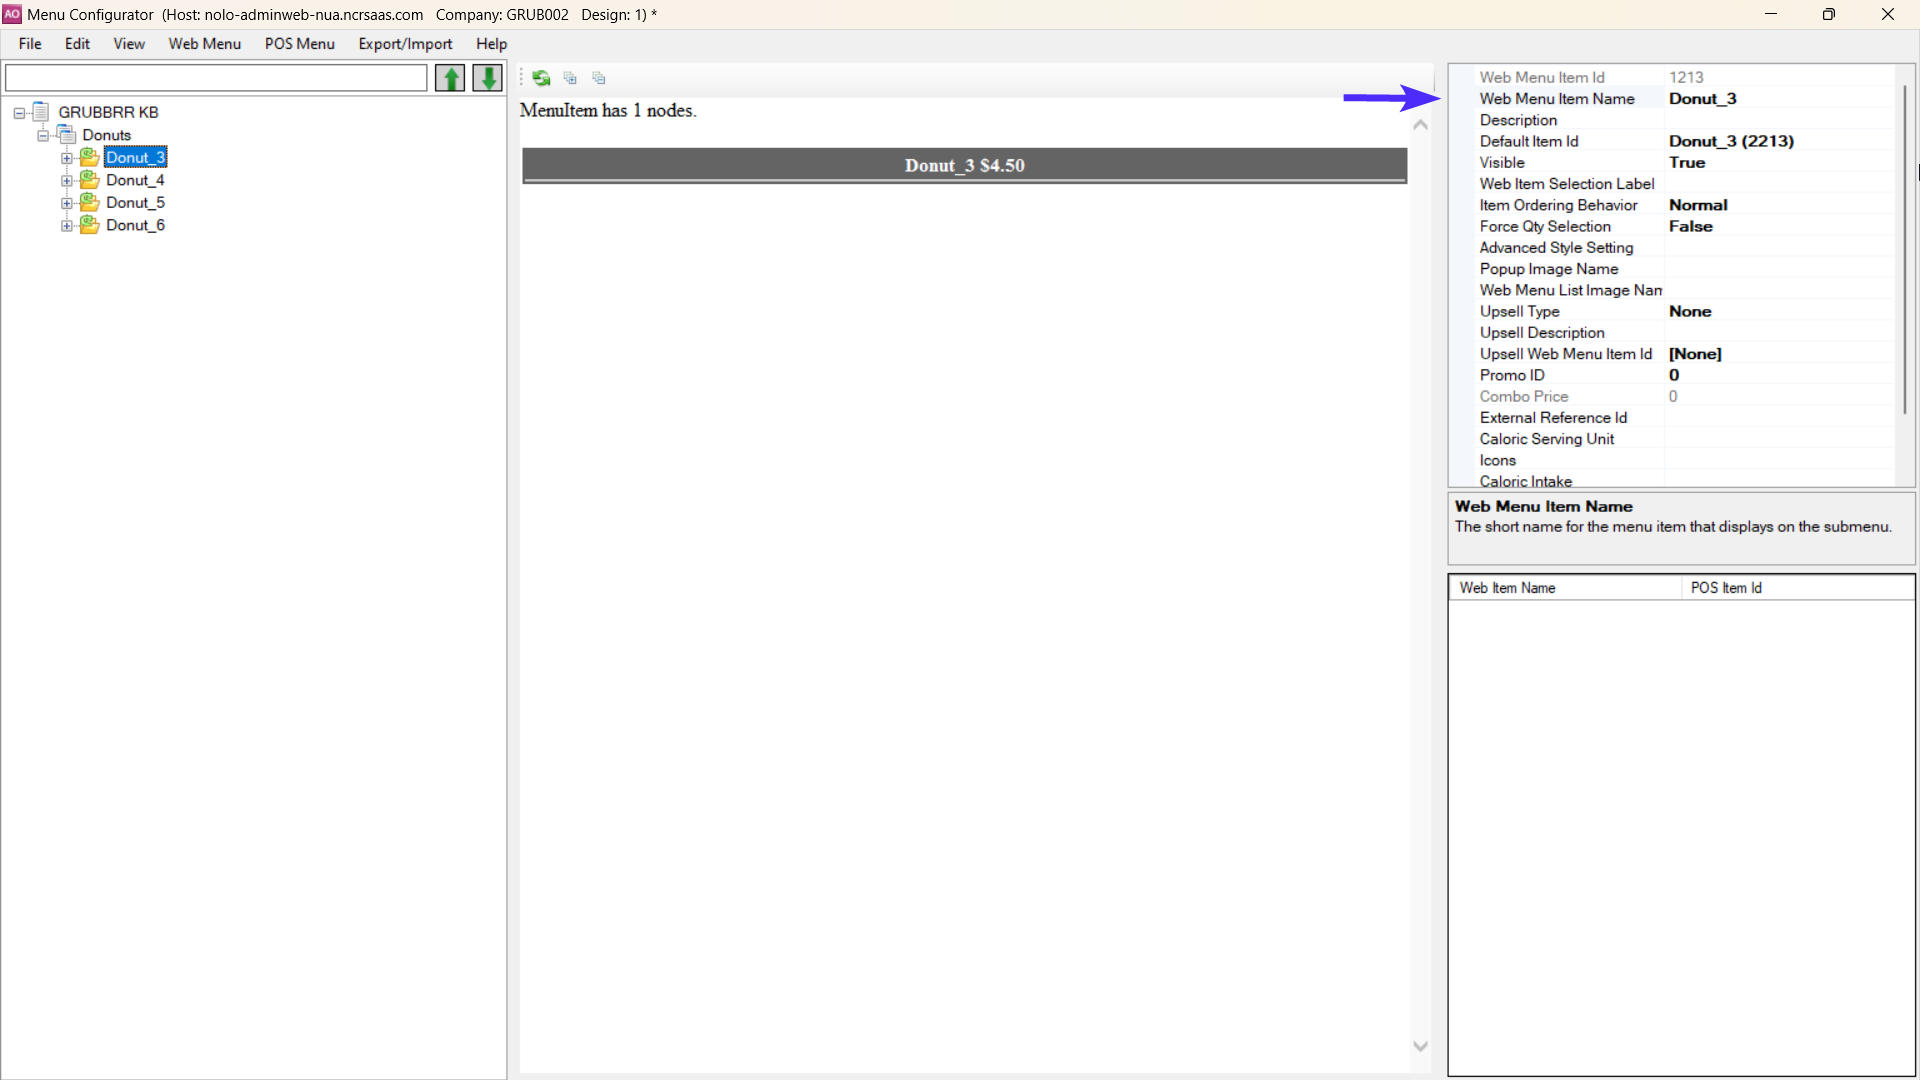
Name
Description
Calories
Important: Popup Image Name
This links the item to an image uploaded to NCR’s online portal and must be the exact same as the name used there
How do I add images to the NCR Portal?
As mentioned in the previous section, Web Menu images are not uploaded in the Configurator. Instead, we have to upload them to NCR’s online portal. To upload images for your menu items to the Aloha Online Ordering Portal:
From the dashboard, click Designs
Select Graphics and Content from the dropdown menu
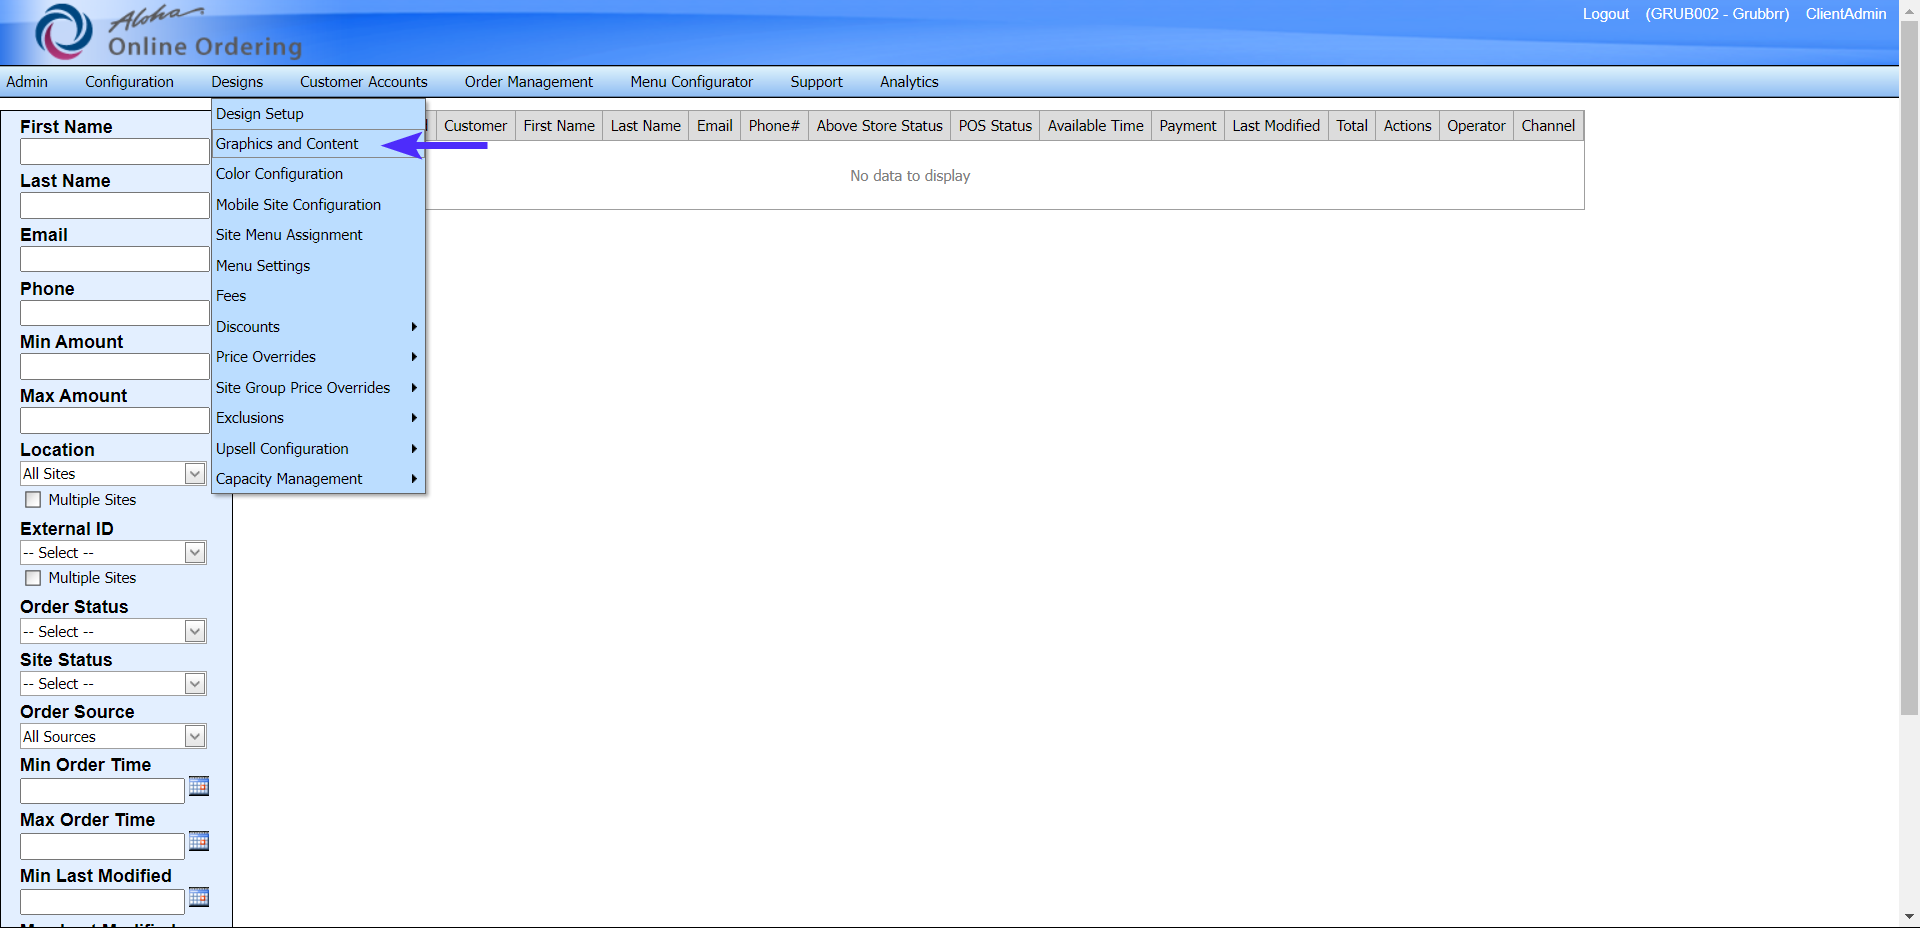
On the Graphics and Design page, you can select one of two options:
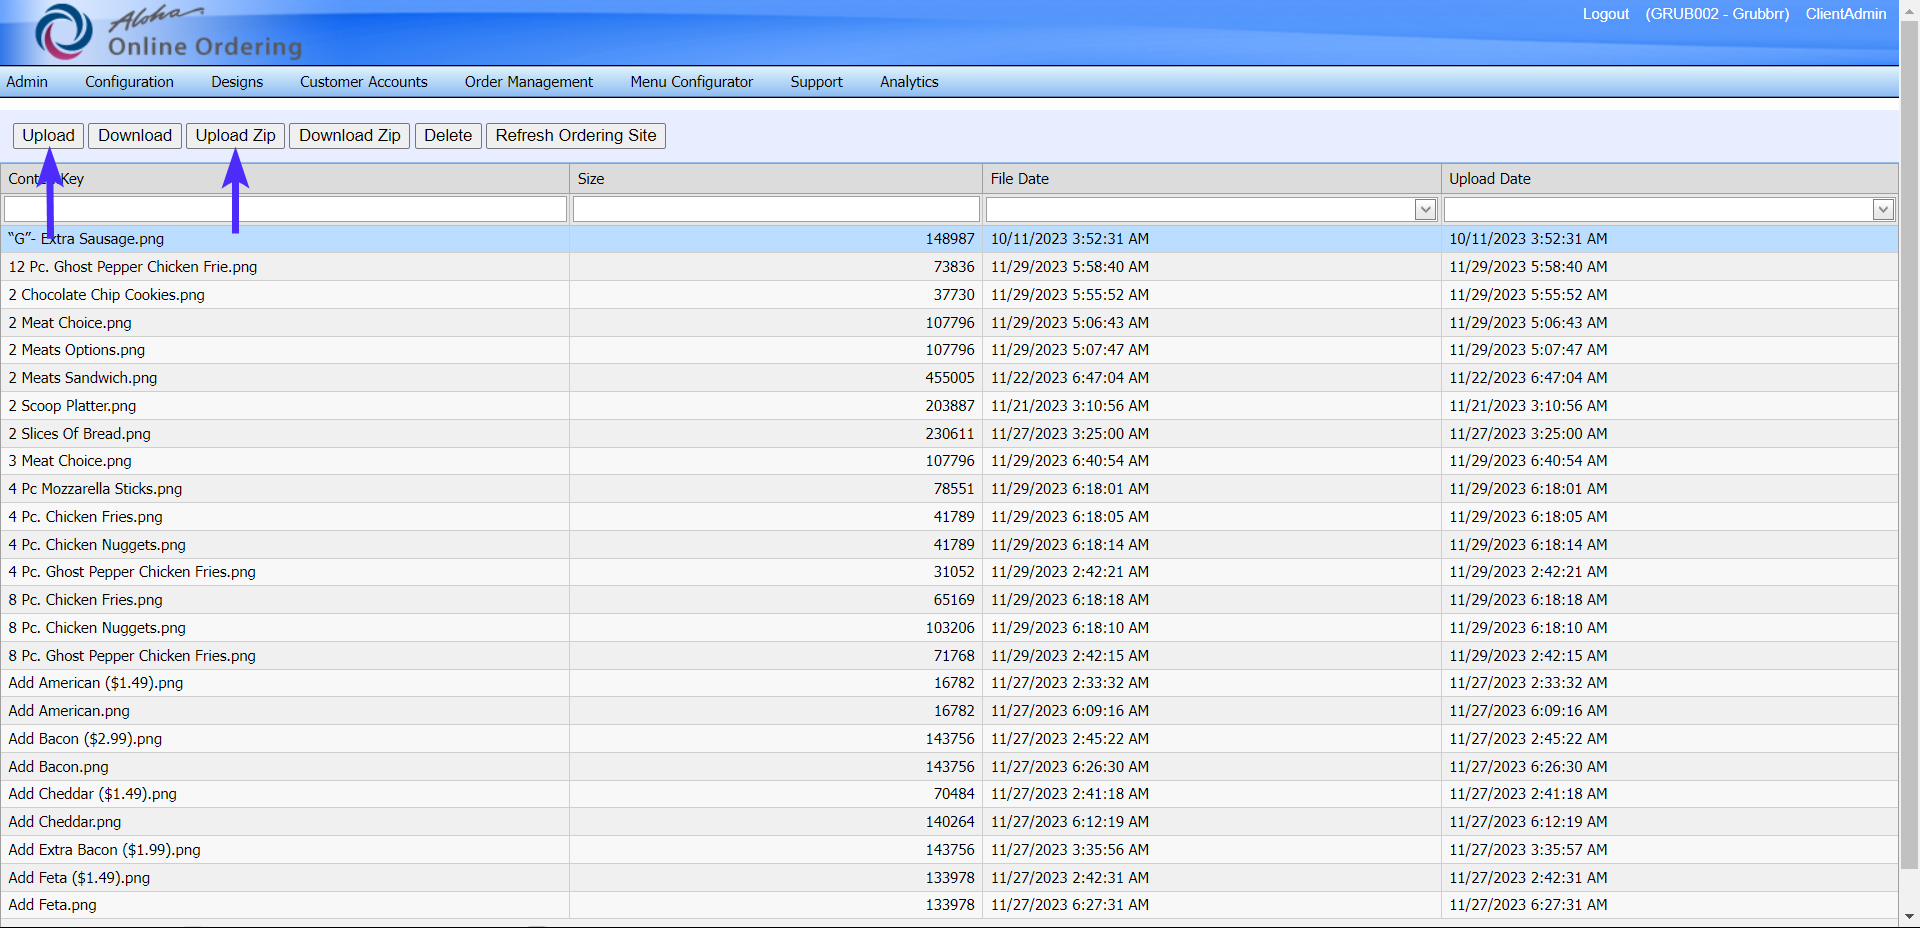
Upload allows you to upload a single image to the portal, while
Upload Zip allows you to upload an archive containing multiple images at once; this is best if you have a lot of changes you are trying to make at once
Make a note of the Exact File Name of your uploaded file, including the file type. This must be entered in the Configurator tool to map the image to a menu item
How do I manage Modifiers in the Configurator?
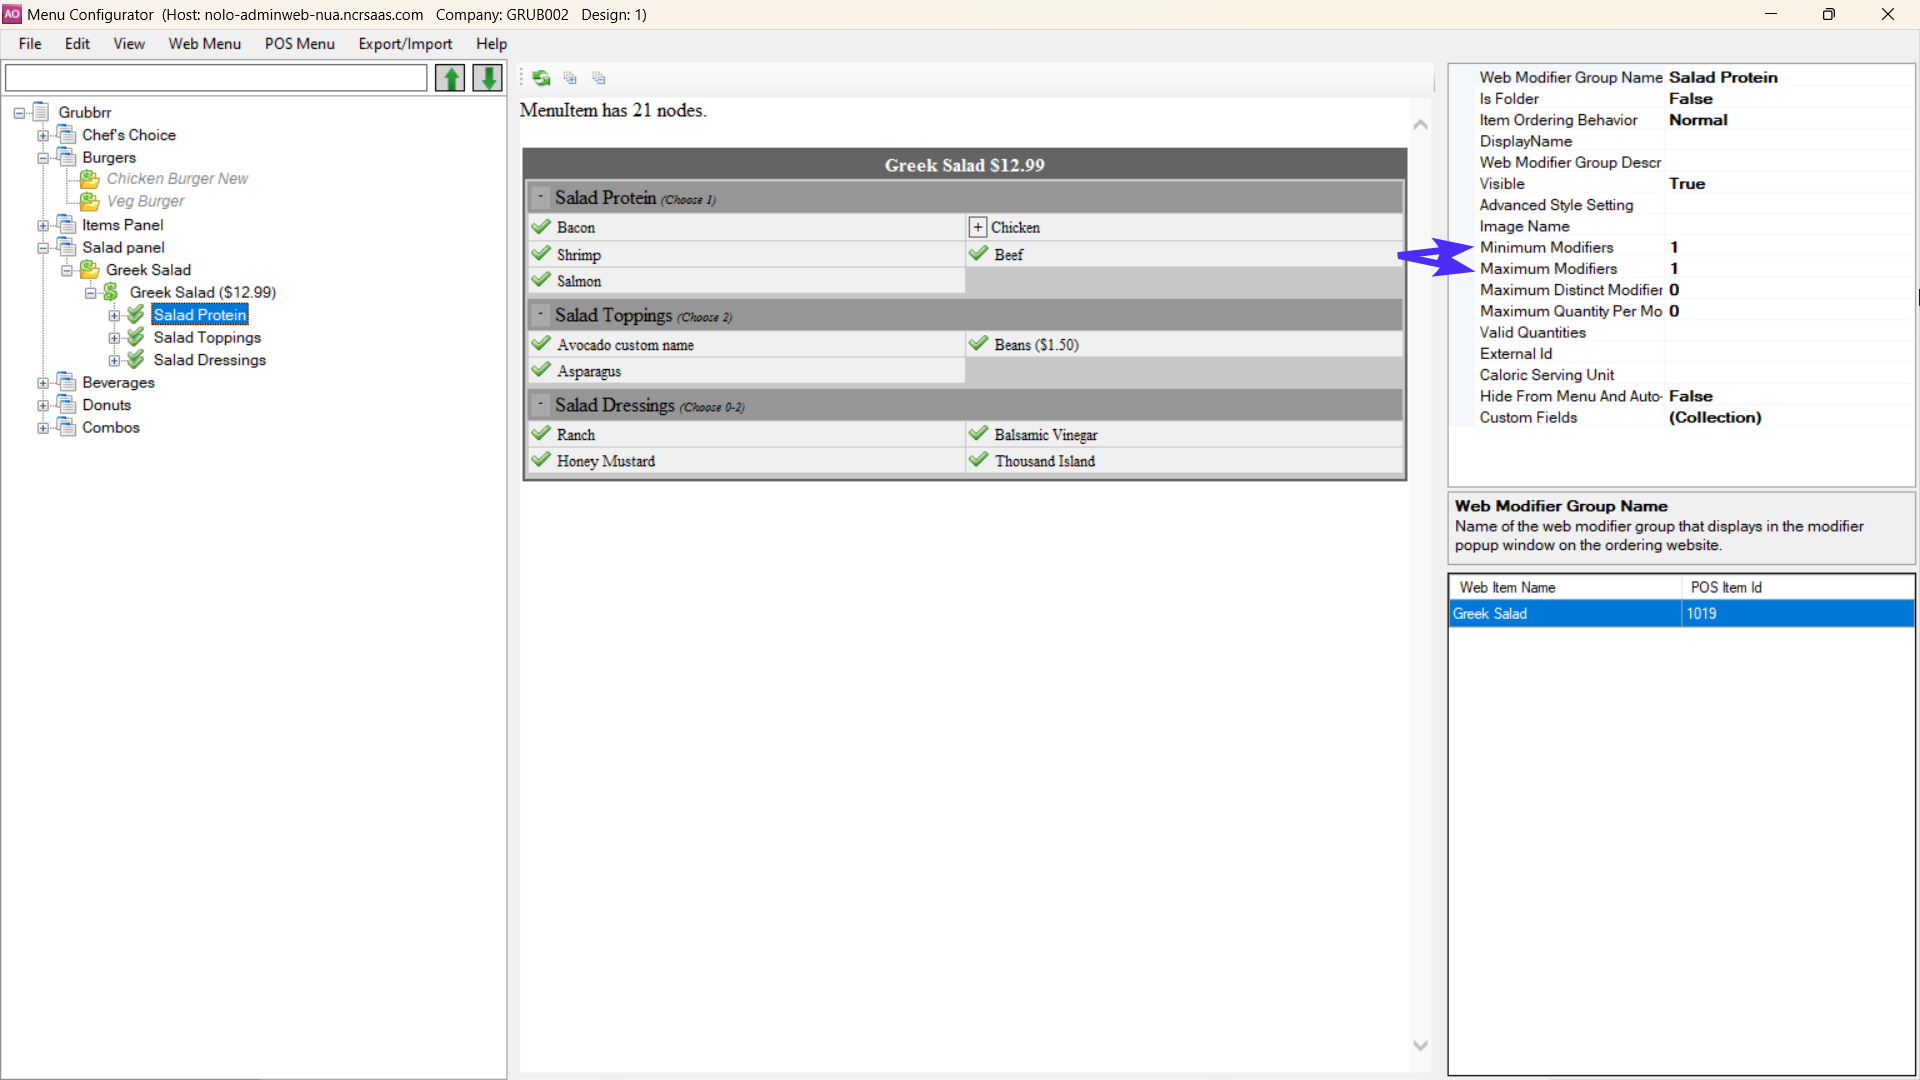
Whether you create new web menu items or share from existing web menus, the configurator will import the item and any mapped modifiers to your new web menu. If desired, you can update the Minimum and Maximum quantities for those assigned modifiers; however, any changes you make to these values must align with the values assigned in your POS. So, if you have a modifier with a minimum value of 1 in the POS, you could make that minimum 2 for your web menu, but not 0. The same is true for maximum quantities as well. If you want to change the minimum or maximum quantities of a modifier in the configurator tool:
Navigate to the specific modifier name you want to update in the left menu pane
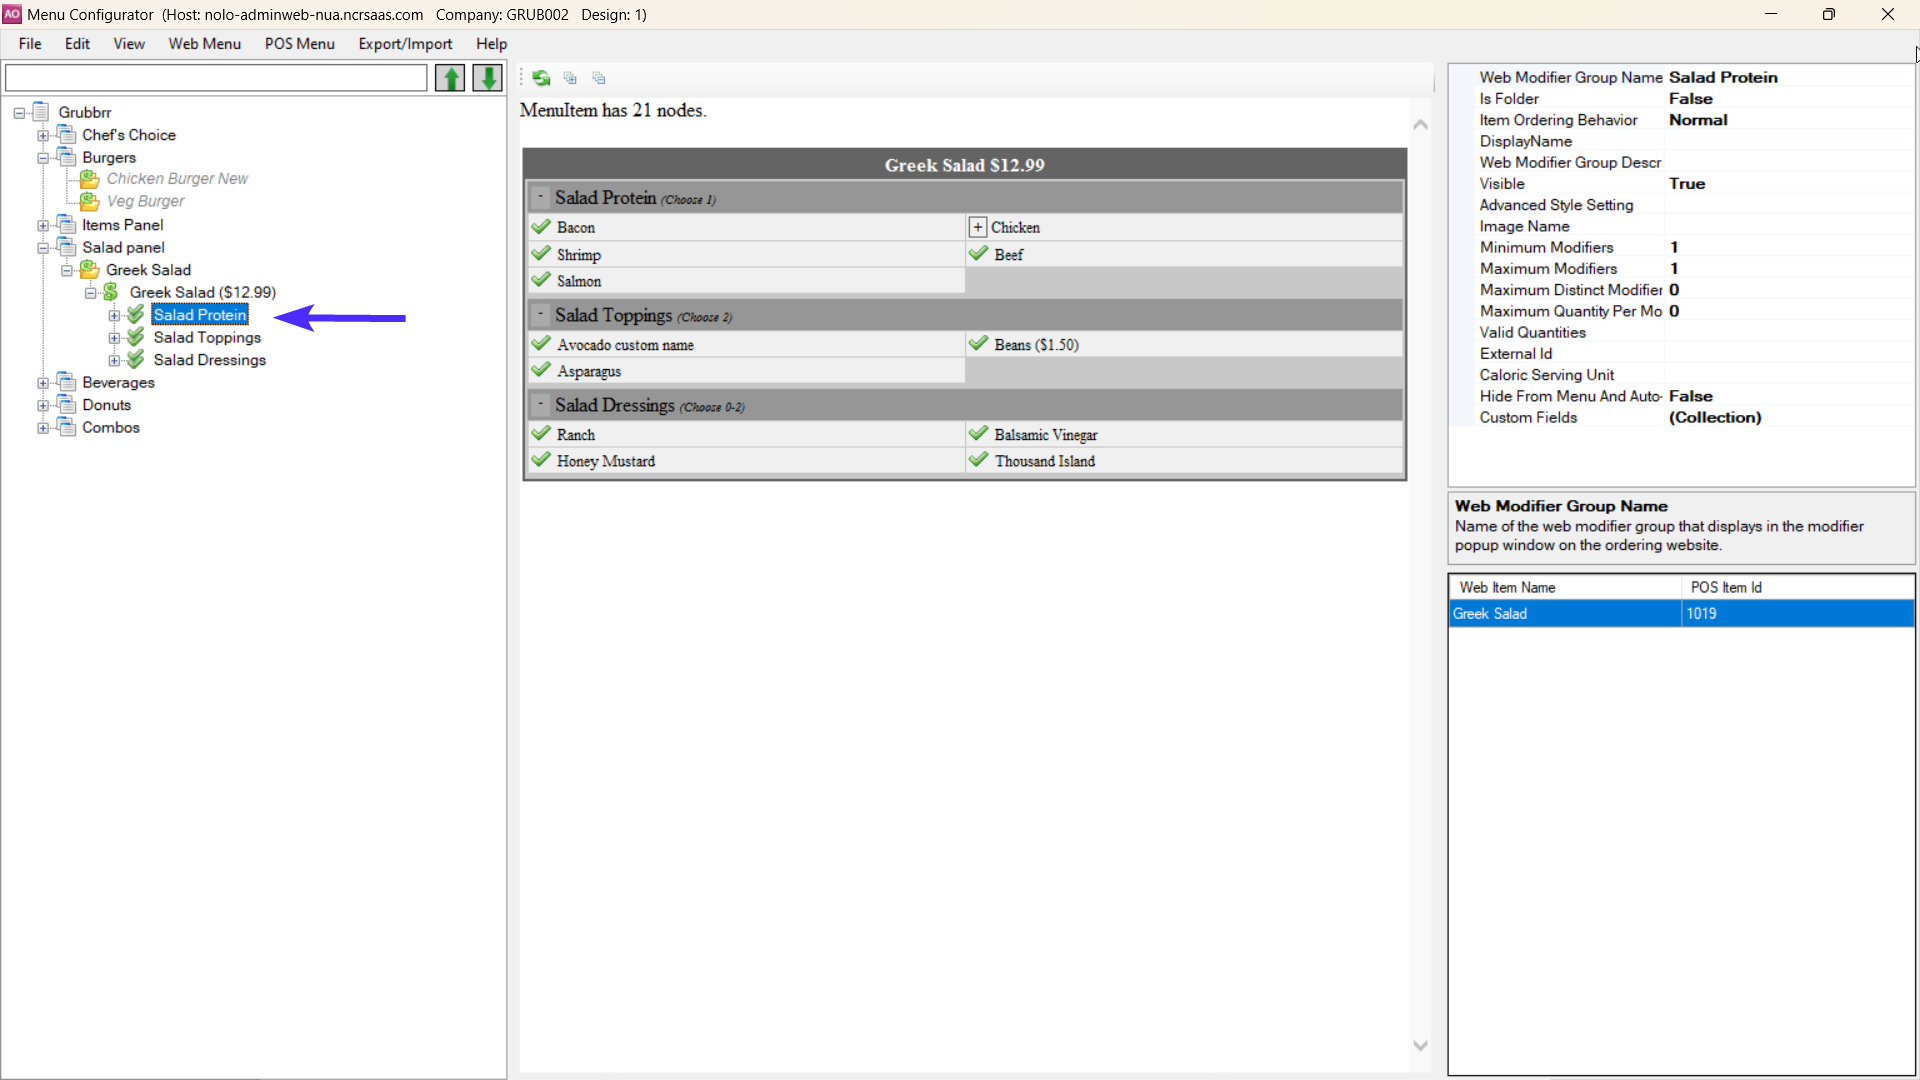
Update the Minimum Modifiers and Maximum Modifiers values in the Details window on the right side of the screen
Why did I get a "Modifier Not Allowed" error on my Kiosk?
This usually happens when your menu has been updated in your POS but those changes haven't been published to your online menu yet. The two menus fall out of sync, so orders placed against the older online menu can't be validated.
To fix it:
Open the Aloha menu configurator.
Fetch the latest menu from your POS.
Publish the updated menu.
Sign in to console.grubbrr.com
Click "Kiosk Settings"
Click "Integration"
Click "POS"
Click "Pull Configuration from POS"
Orders should validate normally after the sync. If you're still seeing failures, contact support@grubbrr.com with an example order and we'll take a look.