How to Manage Calorie Counts in the GRUBBRR Console
Last updated: August 8, 2026
Can I show calorie counts for menu items on my Kiosk?
How to Activate Calorie Display in the Console
Before adding Calories to your Kiosk menu, you'll need to enable them through the GRUBBRR Console. Calories can be enabled through the Kiosk settings section of the Console if you're using Location-level menus, or they can be enabled as part of a Kiosk Dataset if you're using Enterprise Controls.
During this step, you can also choose to add a label for calories on the Kiosk, either as a prefix or suffix. You can see an example of this in the screenshot below.
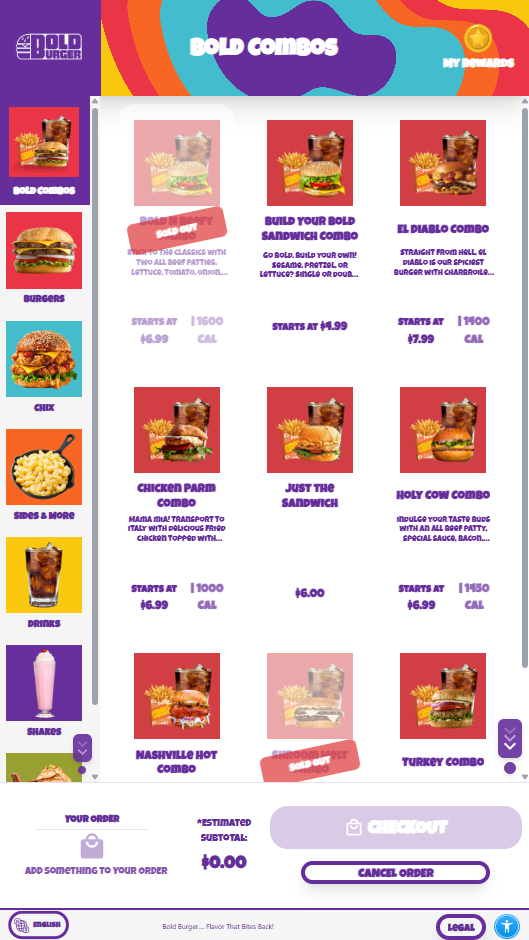
Follow the steps below to active Calorie displays on your Kiosk.
Go to gcc.grubbrr.com
1. Click "Kiosk Settings"

2. Click "Customizations"

3. Click "Features"

4. Click here to add Calories to your Kiosk menu display

5. If desired, you can add a label to clarify that the value being displayed is the item's calorie count; this can be shown as a "Prefix" (before the count) or a "Suffix" (after)

6. Enter the exact label you want to use here
Note: if you're importing Calories from Olo, and you've already added a label on that platform, you should make sure this field is blank. Otherwise, the Kiosk will show both labels in your menu.

7. Click "Save" to apply your changes

8. Click "sync" to push the changes to your Kiosks

Once you've turned on Calorie displays on your Kiosk, you're ready to add calories to the items on your menu.
How to Add Calories to a Menu Item in the Console
1. Click "Kiosk Settings"

2. Click "Customizations"
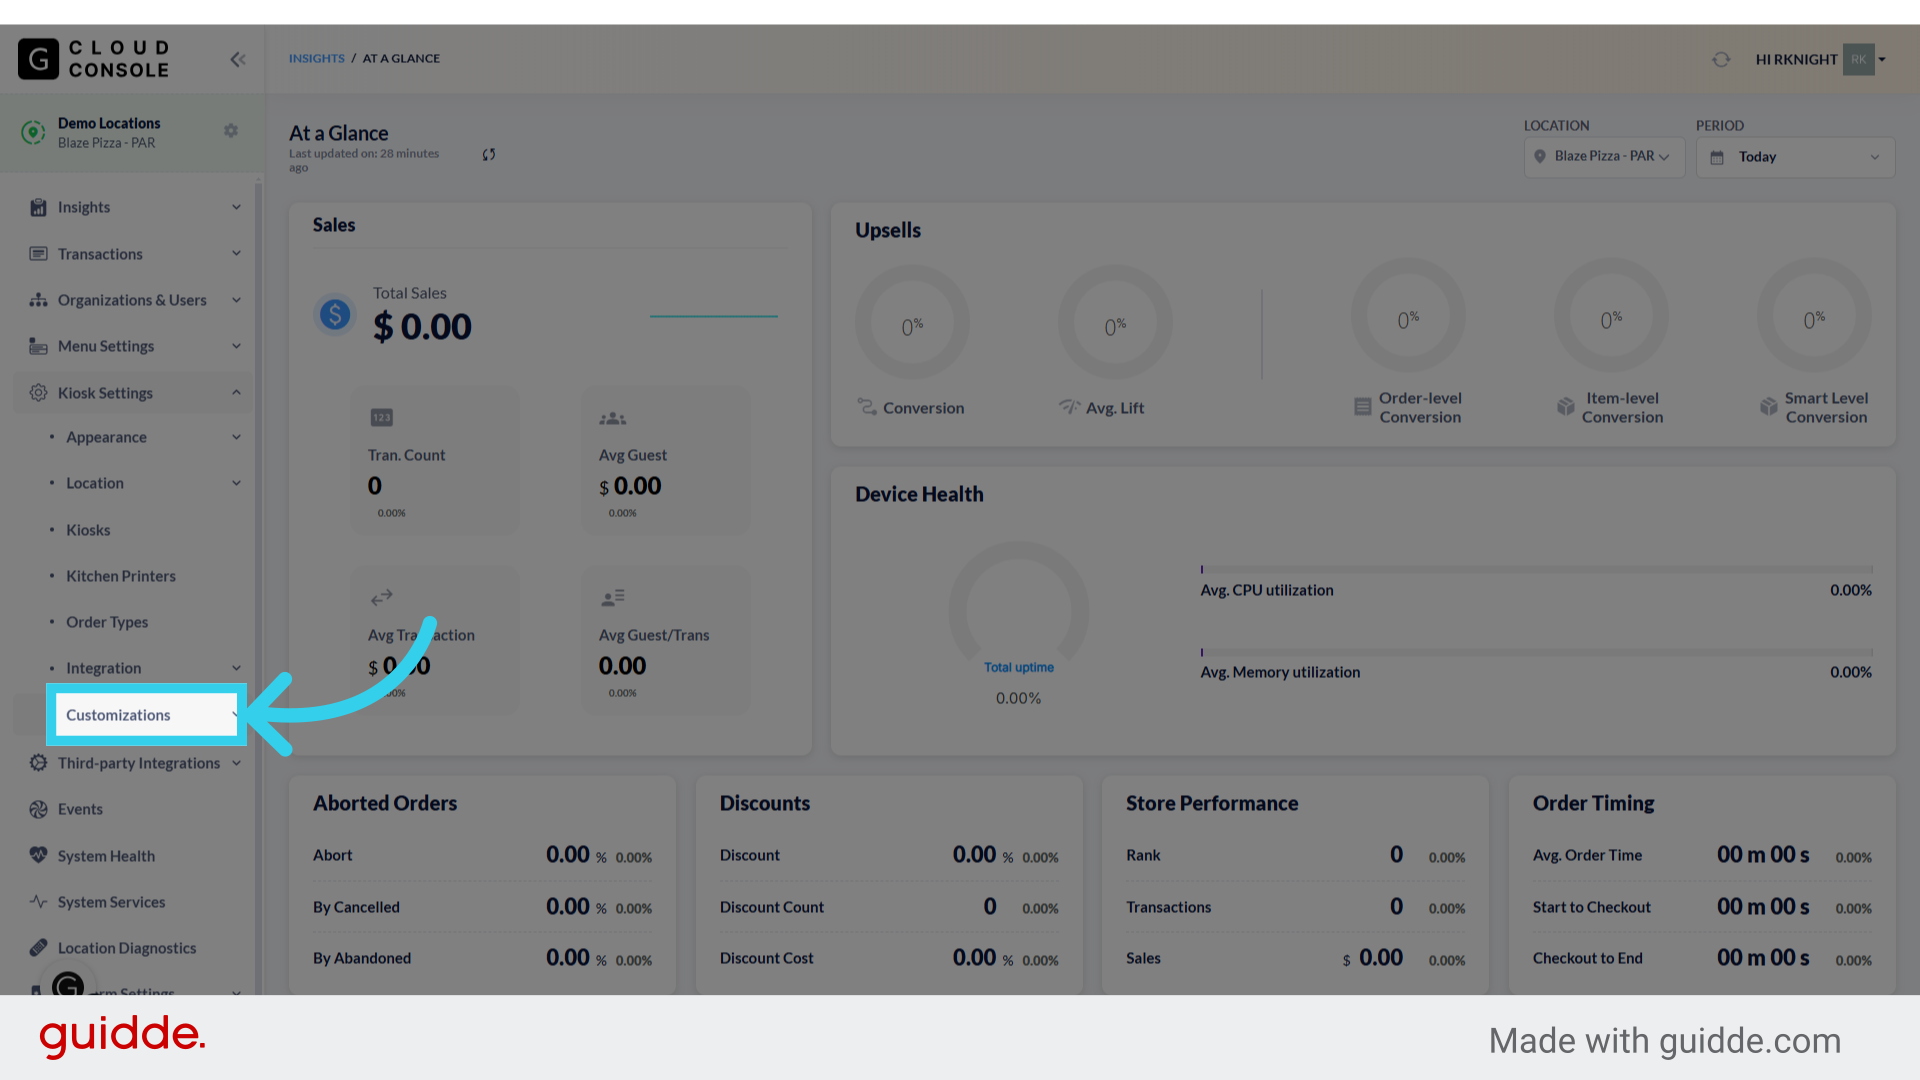
3. Click "Features"

4. Click here to turn calorie counts on or off at the Kiosk

5. With Calorie Counts turned on, we can configure whether the Calorie label displays before...
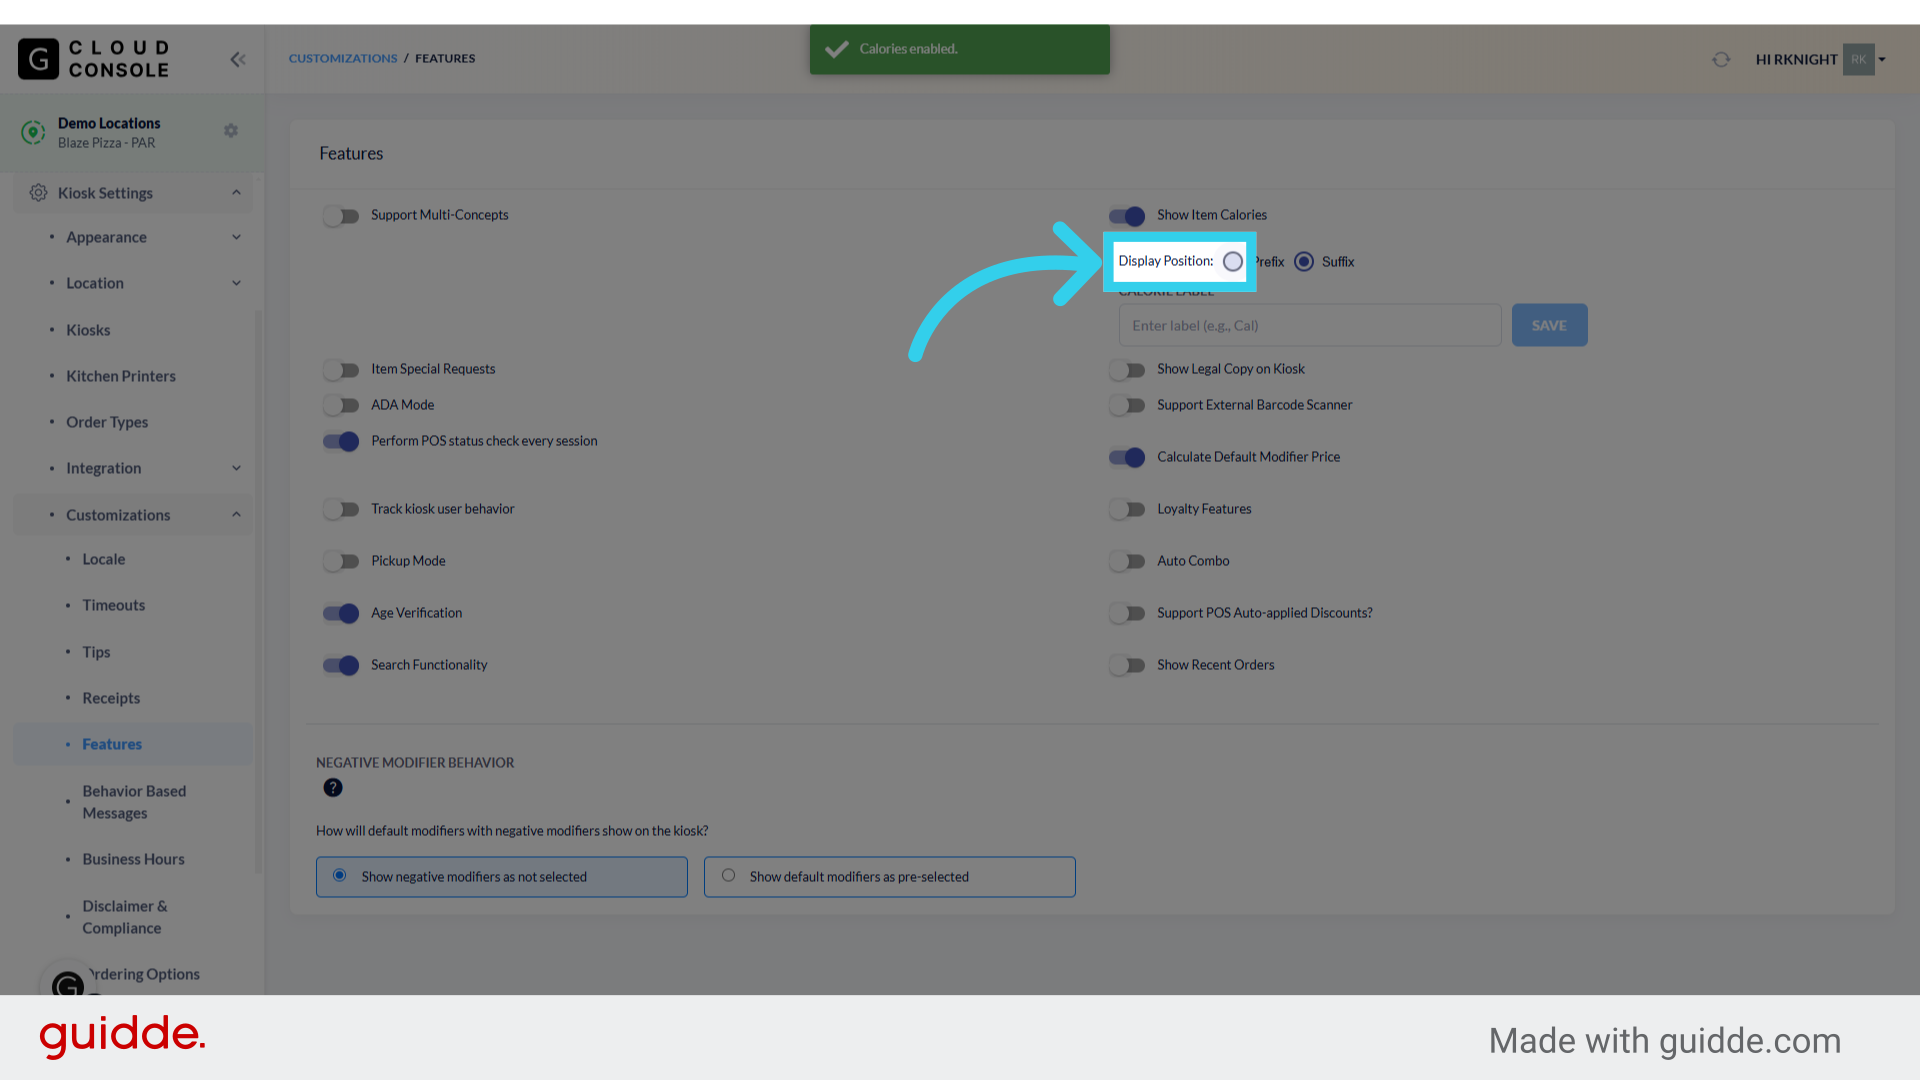
6. ... or after the actual Calorie Count

7. If the client has a specific calorie label that they want to use, we can enter it here
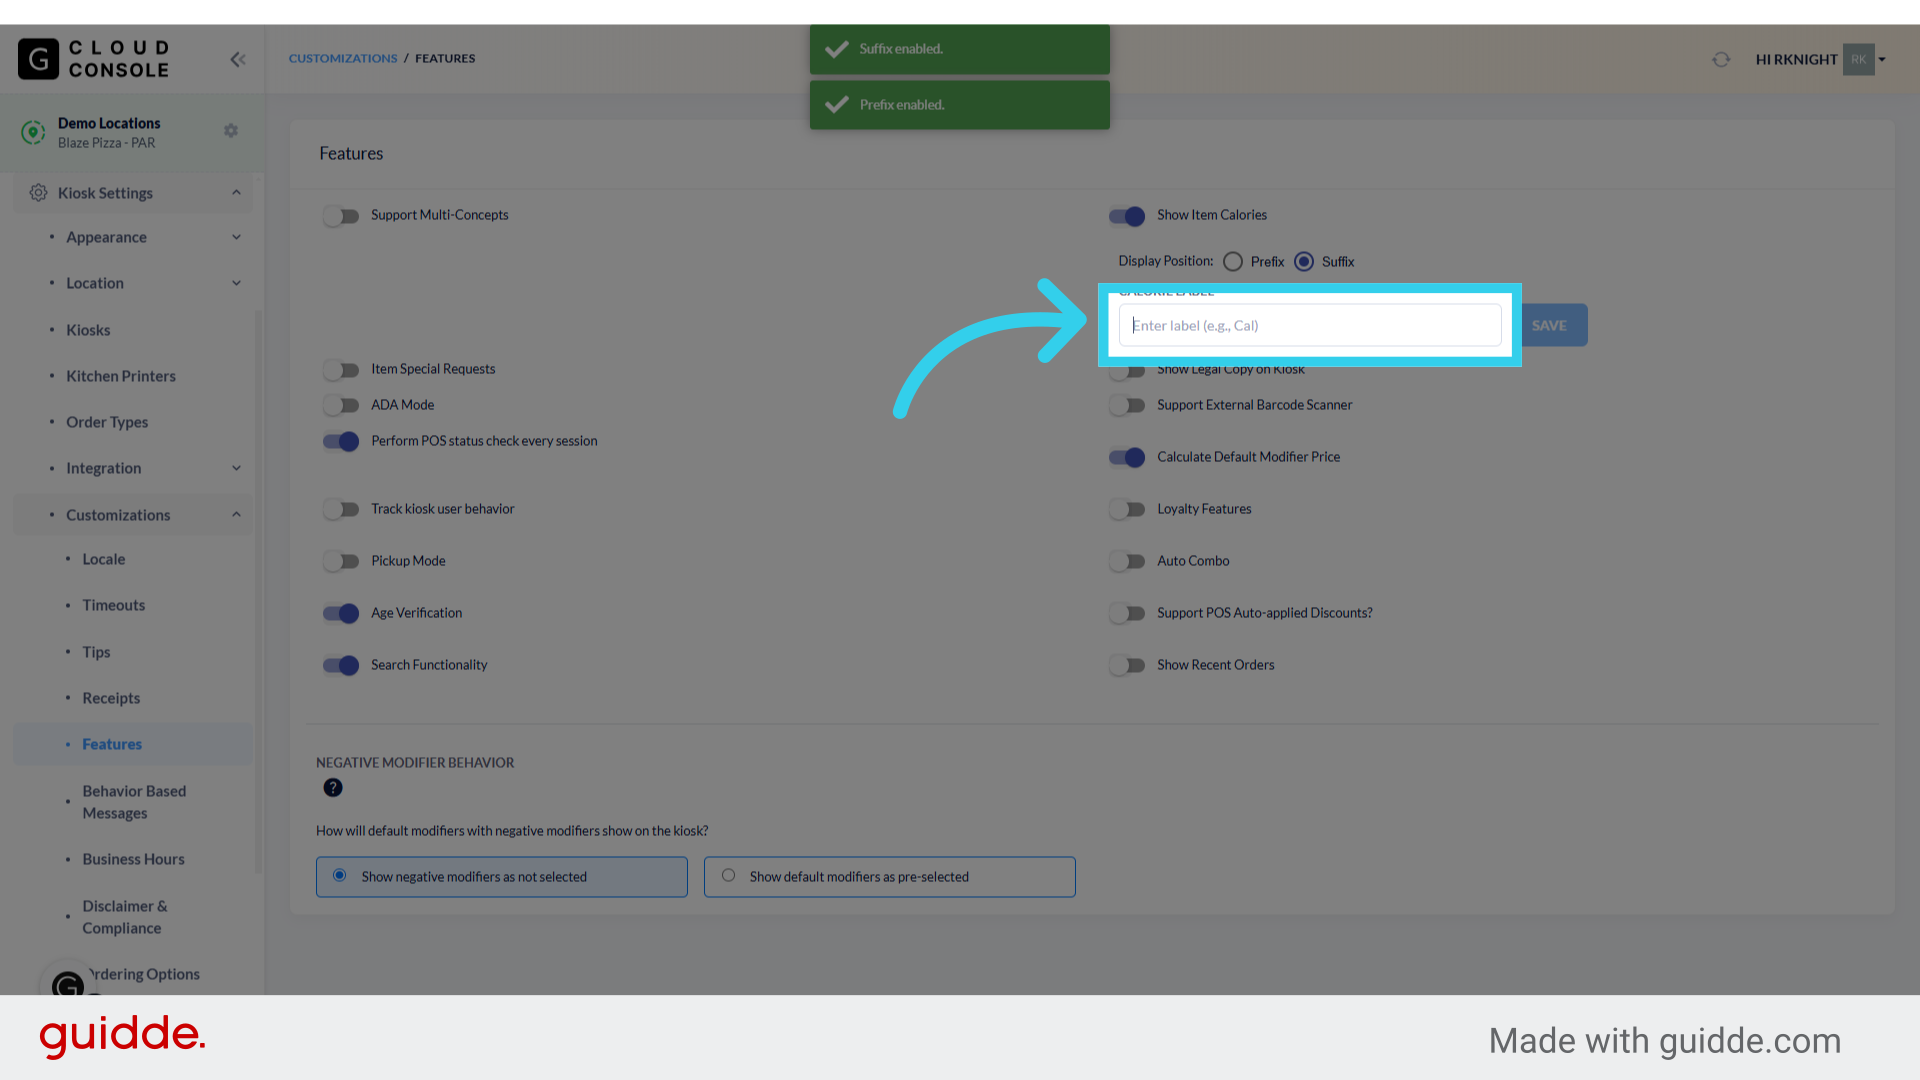
8. Click "Save" to apply your changes
